Clearomizer and Tank Basics
31st Jul 2017
When you decide to move over to vaping (a wise choice, even if we do say so ourselves), you have to take a minute to get used to the lingo. True, you could just pick up a starter kit which is mostly plug and play however a basic understanding of the parts of an e cigarette is important, which is why we’ve put together this basic guide to clearomizer and *tank basics.
*Clearomizers and tanks are essentially the same thing. Clearomizer is used most often however where you hear “tank” you are hearing about the same piece of kit.
What are Clearomizers?
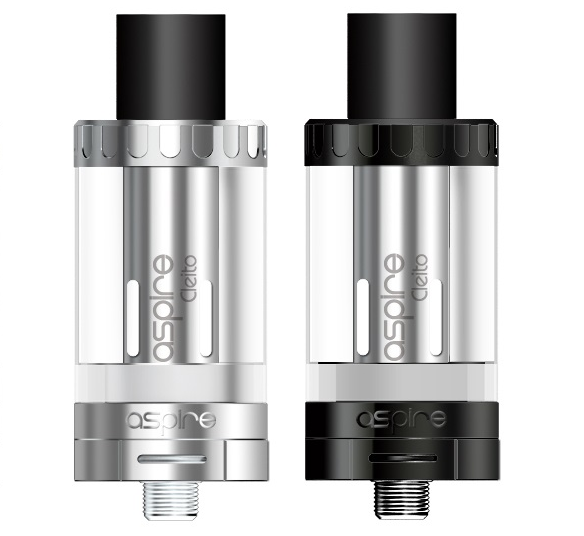
We’ve already established that a clearomizer is a
tank. The tank is filled with e liquid. From its name clearomizer you can guess
that these tanks are… clear. By clear that means that you can see what’s going
on inside. Once upon a time clearomizers were made from metal however what
makes clearomizers different from cartomizers (a blog post for another day) is
the lack of filling within the tank.
Clearomizers depend upon the reservoir that contains the e liquid which in turn
surrounds the wick that is attached to/part of the coil. A cartomizer tends to
use a filling, namely an absorbent material which soaks up and holds the e
liquid which is in turn transfers to an atomiser that is built in.
Confused? Don’t be. We are concentrating on clearomizers which are commonly used and often preferred. By all means though do your own research on different tanks, both types and brands after you’ve read this guide and have grasped the basics.
The Inner Workings
Of course, as with everything vaping related and otherwise, there are a number of different styles, types, shapes and so on to choose from. Clearomizers are no different however the fundamental designs remain more or less the same.
There are 5 main parts:
The Tank: The part which contains the e liquid. This reservoir is most often manufactured using plastic or glass.
Chimney and Top Section: The so-called chimney is attached to the coil. It allows for air to move through the tank.
Bottom Section: In order to work a coil needs to be screwed in and connected to the battery which powers your devices. This takes place in the bottom section of the e cigarette.
Mouth Piece or Trip Tip: The mouth piece, as the name suggests, is the part of the device you (the vaper) puts their mouth around in order to take a draw. There are different sizes and styles so that you may choose something that suits you best.
The Coil: Without the coil your vaping experience would be dull indeed as without the coil which heats up the e juice, there would be no vapour. There are various different coil types and what you use will depend of your device and your preference.
Types of Clearomizers
There are many different types of clearomizers and while they all do the same thing, they all do it slightly differently. We stock a number of clearomizers including popular brands Uwell, Kanger, Aspire, Innokin and more. Types of clearomizers include dual coil clearomizers, bottom dual coil clearomizers, bottom coil clearomizers, variable airflow control clearomizers and dual coil clearomizers.
Don’t be put off by the different types. The basics are more or less the same regardless, and if you read the accompanying manufacturer’s information prior to use you will be able to recognise any differences in how they work and how they must be maintained, including being filled.
How Do You Prime a New Coil?
Once you’ve refilled a brand new clearomizer you need to let it sit for a good five minutes or potentially slightly less if you gently swish the e liquid in the clearomizer around the wick in order to encourage it to become saturated.
Your patience will be rewarded as if you try and vape straight away with a dry wick you are going to experience a really rather awful burning taste. We’d advise waiting! That way you get to enjoy the pure form of the flavour of e liquid you’ve chosen, rather than a burnt toast version. The better soaked the wick is, the better the vape.
If you’ve chosen to use larger coils ensuring the entire wick is well covered and saturated with e liquid is a must. Make sure this is done effectively by using 4-5 drops of the e liquid, dropping it onto the cotton at the bottom of the base, as well as around the sides and the top of the coil to ensure all material is thoroughly wet and saturated through.
Filling Up a Clearomizer
This is one of the tasks you need to learn as it is a basic requirement of vaping. Make sure that you check the instructions that accompany your clearomizer as different brands feature slightly different designs as well as their own advice for how to fill their specific model.
The general rule of thumb however is to go steady, to be careful and to avoid dropping e liquid into the centre tube of the clearomizer. This applies regardless of whether your clearomizer is a bottom filling or top filling model. Getting e liquid into the centre section will result in leakage, mess and may disrupt the inner workings of the device, perhaps damaging the parts completely. A steady hand wins the game!
Tilt the clearomizer when filling, taking care to not fill past the maximum fill markings, if your tank has these. A top tip for filling is to use an e liquid bottle with a very fine tip to it. This makes dropping the e liquid in easier, cleaner and reduces wastage.
Again, ensure that you make yourself familiar with the brand or model you hold by reading the contained manufacturer instructions for use.
Cleaning a Clearomizer
A clearomizer won’t last forever and therefore will need to be cleaned and maintained periodically. A build-up of e liquid on the coil as well as ensuring the general cleanliness of the clearomizer will go a long way towards making sure that you enjoy a clear and tasty hassle-free vape each and every time. If on examining your clearomizer however you find cracks or other damage it might be time to retire that particular tank and start again.
Cleaning a clearomizer needs to be done very carefully. Some vapers consider their clearomizer as being entirely disposable and discard it entirely once it becomes apparent cleaning is needed. During cleaning damage can occur, which would affect the quality of the vape, or make vaping impossible altogether,
That said, giving your clearomizer a clean when appropriate will prolong the life of the parts, making it the thriftier choice.
A basic rinse will clear up most build-up. This is easily done by breaking down the clearomizer parts and holding them under a hot tap. You may do the same with the wicks (gently) however when it comes to drying the wicks this must be done incredibly carefully as damage could easily occur. Use an absorbent kitchen roll or paper to remove the majority of the moisture and then allow the wick/s to dry out somewhere dry and warm for at least another twenty-four hours before replacing them again.
Changing Clearomizer Coils
Coils are disposable parts of an e cigarette therefore inevitably they will need changing once they’ve burnt out. Generally speaking, it works out cheaper to replace the coils than replace the whole clearomizer. Changing the coils is actually really easy, simply unscrew the burnt-out coils and replace with the new head. Again (this old chestnut, we know), do read the instructions as there are slight differences between makes and models.

Troubleshooting
It would be great if everything was plug and play, and while this does occur most of the time with vaping, there are times when things don’t go to plan. Here are some quick tips for those times when things aren’t working as they should.
Read the darn instructions! You’d be surprised how many people call manufacturers and hit forums, waiting for someone to come back and hopefully have the right answer to a model-specific enquiry when all they had to do was read the instructions their clearomizer and parts came with. If these have been lost, a quick Google for the manufacturer’s website should help. Make it easy on yourself and make this your first port of call when something isn’t working right.
Make sure everything is properly connected. The clearomizer needs to be properly secured/screwed-on to the base in order to work.
Check the battery. Yup, if things aren’t firing up and you are sure that you’ve connected everything up properly you might find that it isn’t actually a clearomizer issue at all. Power issues more often than not start with the battery.
If you smell burning… stop! Check your e liquid level first of all as this is a common cause of burning smells. Next, look to make sure that there isn’t a build-up of e liquid “gunk” around the coil. If this isn’t the problem have a good look at the wick. Is it burnt out? It’s important to remember that wicks/coils are disposable items and so won’t last forever. Sometimes the quick fix is to just replace the part.
Take note of the gasket (silicone and sitting on top of the heating coils). If this is out of place it can cause a blockage.
Replacing Your Clearomizer
As you know, clearomizers aren’t permanent parts.
They do break, they do wear out and they do need replacing. Long-term it makes
sense to choose a clearomizer that allows you to replace the coil heads
yourself as this works out cheaper. A clearomizer may last as little as a few
weeks to a good few months. It all depends on the type, how you use it and how
well maintained it is.
If you spot cracks or chips and if you still smell
burning after replacing coils/checking wicks etc replacing the clearomizer is often the best course of action. You might want to read our Stop Your Coil From Burning Out blog for more information avoiding non-clearomizer coil burning problems.
Become an Expert
The best way for you to become an expert in the field of coils, wicks and clearomizers is to practice. Refer back to this guidance, get to know your device and read the instructions. Over time, with practice, caring for your device will become something you do quickly and easily, allowing you to enjoy seamless vaping without interruption.
